Beginning a WordPress site with Hostgator resembles a cakewalk, even for novices.
An Individual can Begin a site on Hostgator over 20 minutes only by Spending $2.75/month that contains a free domain, free SSL, free site builder, unlimited information storage & storage, unlimited emails, and 24/7 customer service.
So catch a HostGator program Straight Away and start blogging today. Either you have some understanding about Hostgator, or else you’re advised by almost any fellow blogger, friend, or colleague and also do not understand what Hostgator is about.
Whichever the situation is, Allow Me to inform you straight away, Hostgator is one of the significant web-hosting providers, and you can proceed with Hostgator without thinking twice.
Table of Contents
What Blogging Platform Should You Use?
A blogging system is where you edit your articles and arrange your blog posts. It utilizes Content Management System (CMS) software. The hottest CMS applications by much are WordPress.
Hosting is the home of your site. You rent space to your website. It is somewhat like leasing a shop on a busy high road. Except your shop will be on the World Wide Web. I suggest utilizing the tabbed WordPress blog setup.
The overwhelming winner to get a self-hosted blog is WordPress. WordPress accounts for 59.7percent of software-built sites. That is enormous — and also a tribute to the aid of its loyal and active community. WordPress.org entirely runs volunteers around the world.
It is a stage that was initially designed only for Bloggers, but nowadays, WordPress has become much more.
So Where Can I Get Hosting?
Hostgator comes under the top best web hosting providers. HostGator offers you cheap and superior web hosting solutions even if you wish to begin one site or unlimited sites.
Hostgator was set back in 2002, Oldest hosting Business providing hosting solutions at very reasonable costs with the most high-grade attributes making hosts alternatives primarily for budget-friendly clients with high updated down strategies.
More than 9,000,000 hosted domain names and recorded from the lists of the planet’s top 10 largest hosting companies.
With only starting programs of 2.75/month, you can get complimentary Committed IP with coupons using our exclusive voucher code to receive discounts. Hostgator is primarily employed by bloggers, small companies, owners, and WordPress users that are only beginning.
If you are a brand new Internet Business user and wish to begin your Online shop, sites to operate small to moderate scale site and have hardly any budget to invest today is the time to start what with free 30days trial no credit card needed.
Hostgator is our #1 suggestion for beginning your internet business. To get a brand new WordPress blog host customers, what matters the most is expecting the host firm, and much more is using its pricing. Many newcomers don’t have a massive amount to cover.
Hostgator offers shared, VPS, dedicated, and handles WordPress server hosting programs.
How to Begin a WordPress Blog on HostGator
Slimming down, at this moment, presenting you with a simple step-by-step guide about the best way to begin a WordPress site with Hostgator.
Step 1. Pick a Hosting Package
First of all, Visit the HostGator site, then click the “Get Started!” button. Here, you may see three hosting programs: Hatchling, Baby, and company.
1. Hatchling Plan ($2.75 a month) + 60% Discount
It is the thing plan of Hostgator which costs just $2.75 a month which lets you host and have the attributes like:
- Single domain
- One-click WordPress supports
- Free CPanel
- website transfer
- Unmetered bandwidth and bandwidth
- Free SSL certification
- 1 Year Free domain comprised
If You Would like to create only one site, select the Hatchling Plan, and should you want to make at least two sites, then opt for the Baby plan. To choose a program, click the “Buy Now!” button.
2. Baby Plan ($3.95/month)
Here is the mid-level strategy for which you need to pay $3.95 A Month.
The gap between the Hatchling program and Baby Plan is The Baby program lets you host unlimited websites, whereas the Hatchling Plan allows just one website.
3. Business Strategy ($3.50 a month) + 65% Ignore
Your final and Effective plan HostGator plans include here are the attributes;
- Unlimited domains
- One-click WordPress supports
- CPanel site
- Free Website move
- Free SSL certification
- Free update to Favorable SSL
- Free committed IP
- Free SEO tools
- Free domain comprised
If you’re looking forward to creating only one site and do not have any strategy to produce numerous sites yet, you have to proceed with the Hatchling Plan.
Even if you’re getting started studying how to Begin a Site, opt for the Hatchling Plan. If you feel that’ll make more than one site in the not too distant future, go with the Baby Plan.
If You Would like to construct a high-ranking site, you can elect for the company plan.
Step 2: Register a Domain Name
Now it’s time to choose your domain name. Your domain name must be exceptional. To locate the most critical and one-of-a-kind domain name, you can get assistance from domain name generators.
After choosing an Exceptional domain name for your website, input it from the domain name area as shown in the following picture. Additionally, pick a domain name extension such as .com, .net, org, etc. The default domain (that can be .com) is your best if accessible with your domain.
When you enter your domain, you may find “Insert Domain Names Privacy to” at the bottom of the Section.” If you would like to maintain your domain info confidentially, then check the box, or else you may uncheck it. The domain solitude will cost you $14.95annually should you check the box.
If you already have a domain name, pick the second tab, “I Own This Domain Name,” and input your domain.
If You’ve Got a domain name from another supplier, you need to modify the name server in their domain configurations.

Step 3: Complete Your Hosting Order
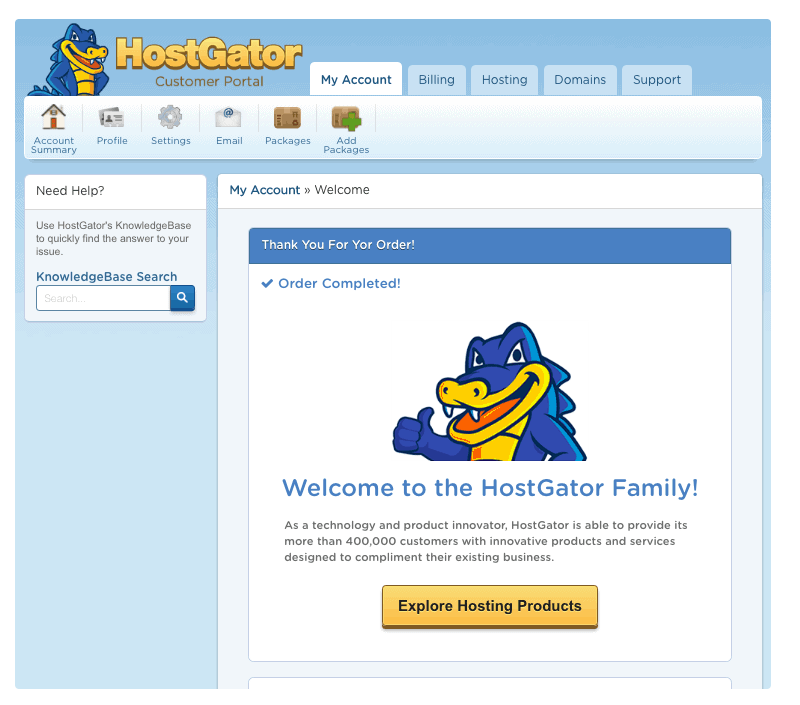
In this step all, You Need to input all of the billing Information Input your name, contact number, Credit card amount, or PayPal, etc. You have two choices for payment manners Credit card and PayPal you can utilize from whatever your pick. Now are pretty close to establishing your WordPress hosting.
Step 4: Install WordPress
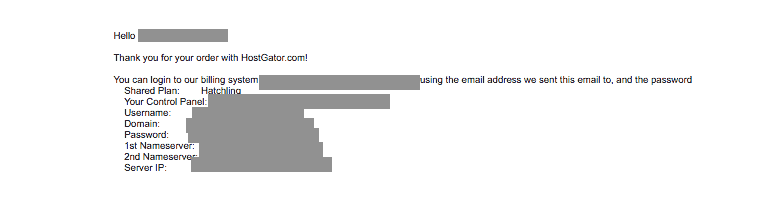
After clicking the checkout button, you’ll get your CPanel Password and username, such as the cPanel link on your email. CPanel is a portal site where you can handle everything about your hosting.
Now click the cPanel link on your email, then input your CPanel password and username. After login into the cPanel, browse into the “SOFTACULOUS APPS INSTALLER,” then click WordPress.
Within the following screen, click “Install.” After clicking the Install button, put in your site name, site description, admin username, password, and admin password.
Must note your admin username and password in a protected place. You can log into your WordPress site using this password and username. In the previous step, click the “Install” button. When the installation is accomplished, you can log into your WordPress site.
Do make sure your domain name is selected in the Application URL section. Leave the box after the slash. Checkmark the Permit Auto Upgrades box. Then enter the Admin Mail, your Blog Title, and Admin User.
Last, enter your name, and then click the Install Now button. Be sure that you use precisely the identical email address and password you’ve utilized while buying the hosting program.
After clicking the install button, You’ll Be forwarded to the Second page, where you need to input these details’
- Pick the version you wish to put in: make sure to select the newest version of WordPress.
- Pick Installation URL: make sure to pick the HTTPS version of the URL.
- Website Settings: Input your website description and name. Don’t worry that you can change it afterward from the WordPress dashboard anytime.
- Admin Account: Input your username and admin password to make it stable since you’ll use the identical password and admin to log in WordPress dashboard. It’s possible to utilize the Last Pass to create a safe password.
- Choose Language: Utilize the language you would like
Now leave all those other alternatives and install them today! Make sure to note down your admin and admin in a safe location so that you can log in in the third time anytime along with other computers. When you click install now, you will see the WordPress setup progress.
When the procedure is completed, you’ll see two distinct URLs for your site live to view and you for WordPress admin login.
Step 5: Login into WordPress

Log in to WordPress by visiting: yourdomainnamehere.com/wp-admin/
To login to a Site, you need to input /wp-admin following your site address. After login into your WordPress site, you should begin posting articles and install WordPress plugins and themes.
Step 6: Get a Theme and Plugins
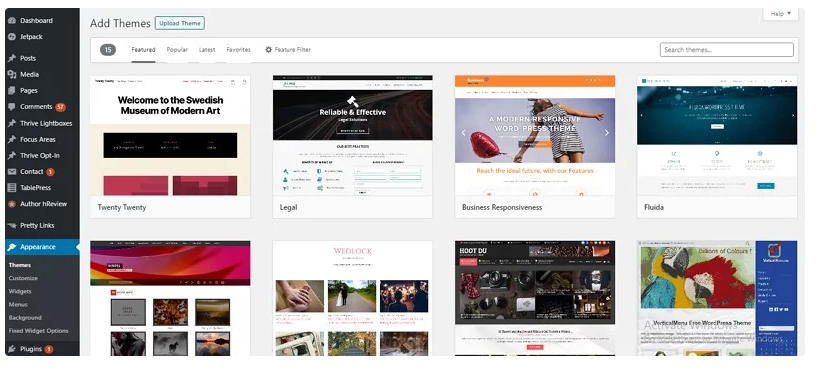
When you log into WordPress, you’ll End up in the dashboard. At the peak of the page, you will see a small house icon next to your username. Please hover over the icon and click it to go to your new site.
The way your website appears depends on which topic you Chosen. WordPress would set up the default Twenty One motif on your blog if you did not pick a theme.
Plugins are application add-ons that improve Your WordPress Site by adding additional capabilities. There are millions of free plugins and themes.
Plugins are application add-ons. Anything you wish to do on your site will be a plugin that will assist you in getting it done, and most of these plugins are not free.
Proceed to Plugins > Installed plugins
Here you can opt to deactivate and delete any plugins you do not need if Jetpack was set up today.
Your WordPress hosting might have set up a security plugin during installation, for instance, Site Lock. It is vital to maintain this plugin. Alternately, Wordfence is a fantastic security alternative and has a free edition.
Your preferred theme may require specific plugins, for example, as a form builder. There are many alternatives for type builders, all free, like Contact Type 7, Ninja Forms, and WPForms Lite. All of these are excellent choices.
Step 7: Start Blogging
Before dive into designing your site, my best tip is to begin writing your first blog post.
- It is tough to determine how your site will appear till you’ve got some material on your site.
- The most significant part of your site is articles.
- People today become lost in perfecting their sites and waste a pile of time.
- The way that your site looks is not as significant as you think it is.
You do not need to overthink composing your very first article. Maintain it simple. Maybe start by simply writing about yourself and why you have created this site. Your very first post is practice. There is every chance you will return and edit your initial post in a couple of months.
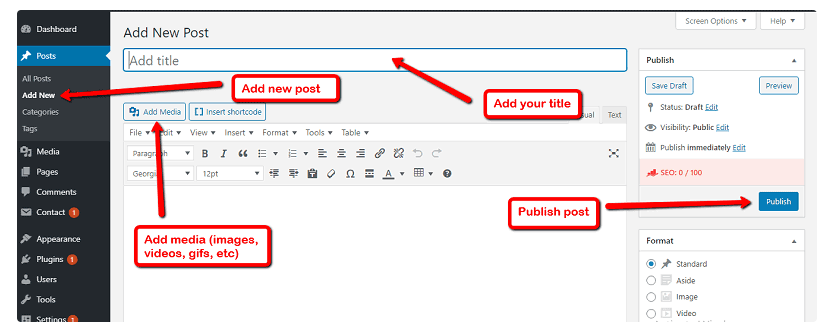
In the left-handed menu, select Articles > Insert New. (You can delete the one known as “Hello World”).
Attempt to create your name stick out. It would help if you caught People’s interest. Add a few text and images. Your very first post does not need to belong. It is far better to bring a couple of brief posts to your site at first. You can develop at incorporating more articles afterward.
The best way to discover inspiration would be to look for sites in your preferred market. It will help you have a clear idea of the sort of site you would like to produce. Blogging is all about making content. If you do not have the ideal range, you won’t ever increase your site and earn money.
The good intentions of constructing your site can come and go as life intervenes. One month you may have plenty of spare time for blogging, and also, sometimes, only getting during the week is all you can afford.
There are hundreds of Various Ways you can Earn Money out of a site, and each will be unique for your skillset. A number of them will need many visitors, and a few earn money from a relatively little traffic.
Follow these 7 Easy Steps:
Step 1: Find your specialty and website subject. Your subject needs an Audience, and your site requires assisting individuals.
Step 2: Pick a blogging system. Your blogging system, WordPress.org, will arrange and edit your articles.
Step 3: Select a domain name. It is your site’s unique Speech online.
Step 4: Sign up for hosting. Your site needs a home. Somewhere to store and serve your content up.
Step 5: Start your website on WordPress. Discover the simplest way to begin a blog.
Step 6: Install a motif and layout your site — understand how to Set up WordPress properly, compose your first blog article and design your website using a free topic.
Step 7: Start earning money. Produce articles, grow your site on social networking, and search engine optimization.
Conclusion
Now Is the Best time to begin your WordPress Site with Hostgator. I showed you that the step-by-step guide on ways to initiate a WordPress site with HostGator in 2021.
Hostgator using a free domain, free migration, free SSL, Unmetered bandwidth, 1-click WordPress setup, 99.9% uptime guarantee, and 24/7 customer service at $2.75 a month is your ideal option for beginners.
Receive a domain name and hosting program now and Begin your Dream site with Hostgator immediately.